
Installation
Maistik Forge ships as a single Go binary named forge. The same binary runs on macOS, Linux, and Windows.
What Forge is (and is not)
Forge configures the AI coding agents you already have. It is not an agent installer and not a hosted service. Local secrets stay local: API keys are read from your environment only and are never persisted. Forge does send anonymous usage and error telemetry — see Telemetry below.
Telemetry
Forge sends anonymous usage and error telemetry to GitLab Observability, on by default. What's sent, every CLI invocation:
- Command name (e.g.
init,implement,review) - Forge version, OS, and architecture
- A random install ID (a UUID generated once on first run and stored in
~/.forge/state.json) — not tied to your name, email, or IP - On failure: a best-effort-redacted error message (file paths are stripped)
Never sent: source code, file contents, repository names or contents, prompts, model output, API keys, or anything else from your project. Your AI coding agent's model calls and conversations are never touched by Forge, telemetry or otherwise.
You'll see a one-time notice printed the first time you run any forge command — on init, or on whatever command runs first after upgrading from a version that predates telemetry.
Opt out at any time:
export FORGE_NO_TELEMETRY=1Requirements
Forge itself needs, at runtime:
- git, curl, Node ≥ 18, and npm — required.
- Homebrew — optional (macOS).
Some features shell out to external tools: forge memory / forge recall use the Engram binary, and the graphify codebase-memory provider needs its own tooling. Both degrade gracefully when absent, but the feature will not work without them.
Install the binary
An active license is required
Maistik Forge Kit is proprietary software. Binaries are distributed to licensed customers through a private release repository. Buy a license on the pricing page, giving the GitHub username of every developer who needs access, and those accounts are added after purchase.
A Scoop bucket and curl | sh one-liners are not yet published.
Homebrew (macOS and Linux)
Forge also publishes a private Homebrew tap, as an alternative to downloading an archive by hand below. Like everything else in this section, it requires an active license: set HOMEBREW_GITHUB_API_TOKEN to a token from a GitHub account with collaborator access to the release repository — the Homebrew equivalent of the GITHUB_TOKEN/GH_TOKEN that scripts/install.sh reads (get access at maistik.studio).
export HOMEBREW_GITHUB_API_TOKEN=<your-token>
brew tap maistik-studio/forge https://github.com/Maistik-Studio/forge-kit
brew install forge
brew upgrade forge picks up new releases the same way.
brew install forge without the tap installs the wrong package
forge is also the name of an unrelated formula in homebrew-core (arrayfire/forge, a C++ visualization library with no CLI). If you skip brew tap maistik-studio/forge ... first — or the tap silently fails because HOMEBREW_GITHUB_API_TOKEN isn't set, since the release repository is private — brew install forge falls back to that unrelated homebrew-core formula. It installs without error, but leaves you with no forge executable at all.
Run the tap command and check its output before installing. To remove any doubt, install fully qualified instead:
brew install maistik-studio/forge/forgeIf you already hit this, brew uninstall forge removes the wrong package, then re-run the two commands above in order.
Download a release
Once your account has access, open the release repository, pick the latest release, and download the archive for your platform:
github.com/Maistik-Studio/forge-kit/releases
Archives are named by platform and architecture, and every release ships a checksums.txt alongside them.
# macOS (Apple silicon), adjust the archive name to the release you downloaded
tar -xzf forge_Darwin_arm64.tar.gz
sudo mv forge /usr/local/bin/forge# Linux (x86_64)
tar -xzf forge_Linux_x86_64.tar.gz
sudo mv forge /usr/local/bin/forgeOn Windows, extract the .zip and put forge.exe on a directory in your PATH.
Pro tip: stop needing sudo for every install
/usr/local/bin is owned by root on a stock macOS/Linux install, which is why mv/upgrade need sudo above. Take ownership once and every future install, upgrade, or Homebrew-style operation into that directory stops asking:
sudo chown -R $(whoami):admin /usr/local/bin(On Linux, swap admin for your primary group, typically $(whoami) or staff.) Do this only on a single-user machine you control — on a shared or managed system, keep /usr/local/bin root-owned and use sudo per command instead.
Verify the download
Every release publishes checksums.txt. Check your archive against it before running anything:
shasum -a 256 -c checksums.txt --ignore-missingWhy bother checking a checksum?
A checksum is a short fingerprint calculated from a file's exact contents — change even one byte, and the fingerprint changes completely. Comparing the checksum you calculate locally against the one Forge publishes confirms the file you downloaded is exactly the one that was released: not corrupted in transit, and not tampered with along the way. It takes one command and costs nothing to skip — until the one time it matters.
Keeping up to date
Once the binary is on your PATH, Forge updates itself from the same release channel:
forge update      # report what is available
forge upgrade     # replace managed tool binaries in place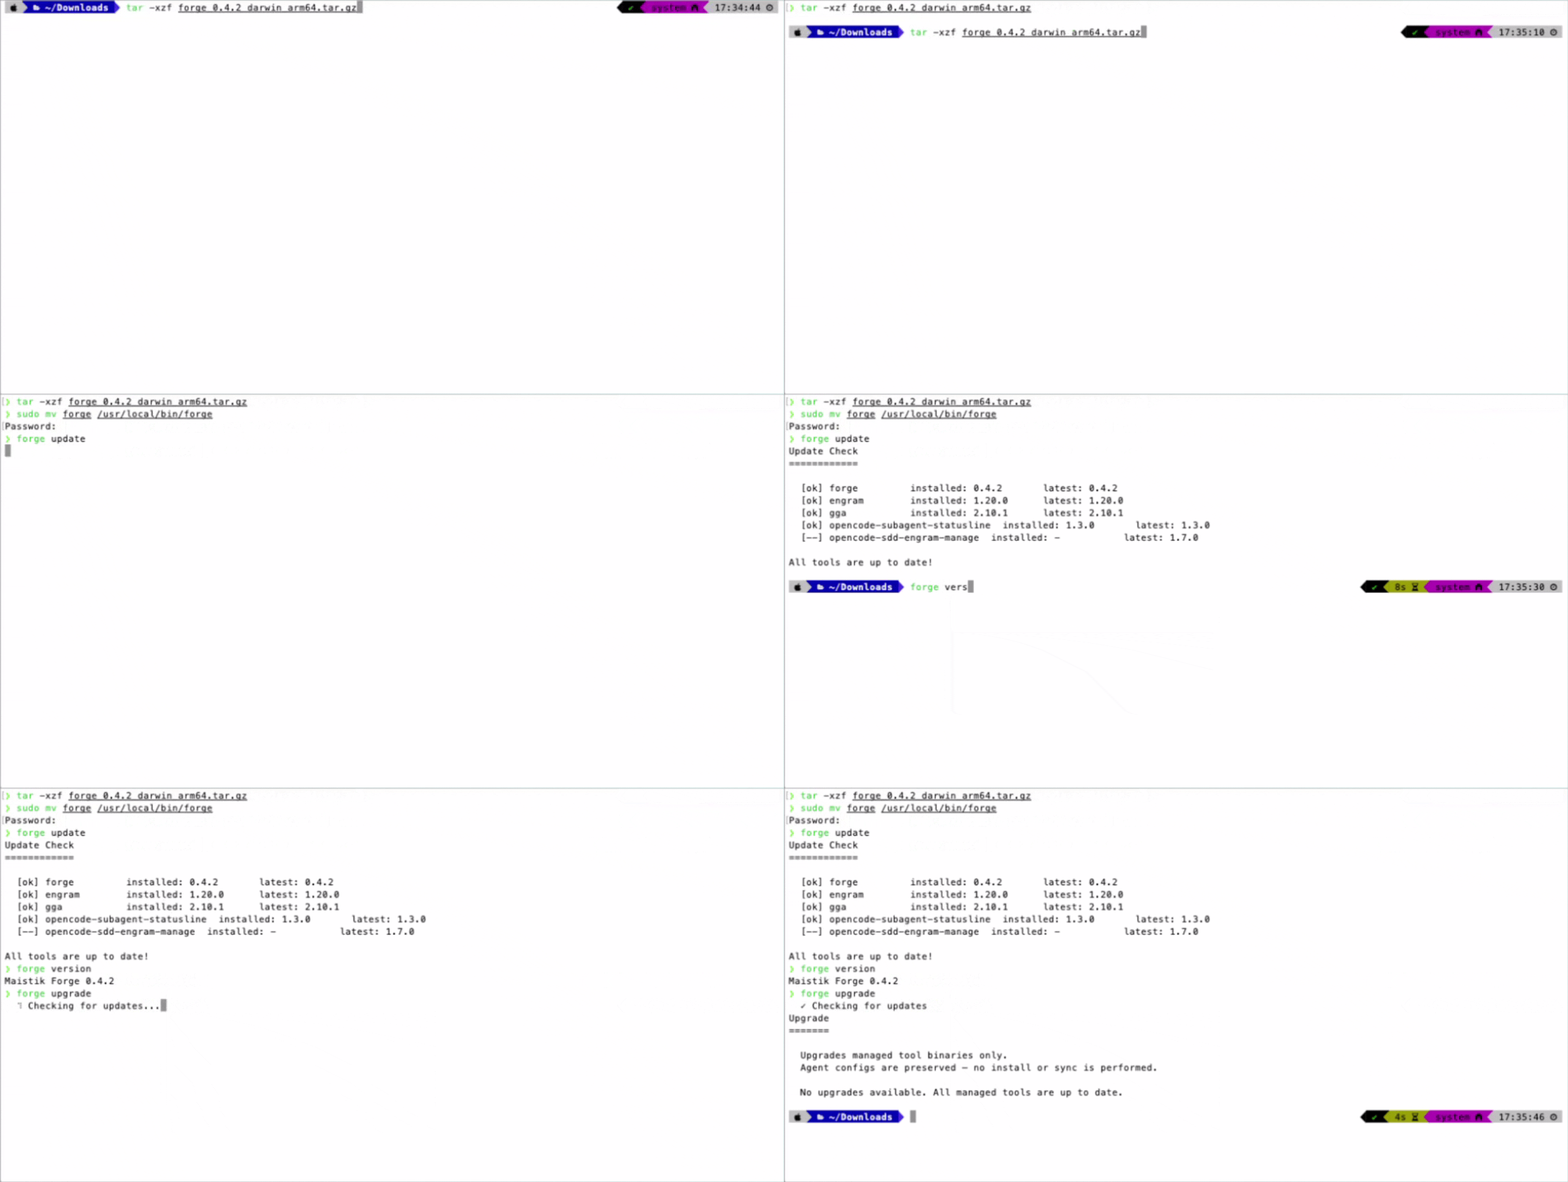
Verify the install
forge version     # is it on your PATH?
forge doctor      # read-only ecosystem health check
forge doctor inspects your environment and reports problems without changing anything. To also smoke-test the binary end to end:
forge doctor --selftestConfigure your agents
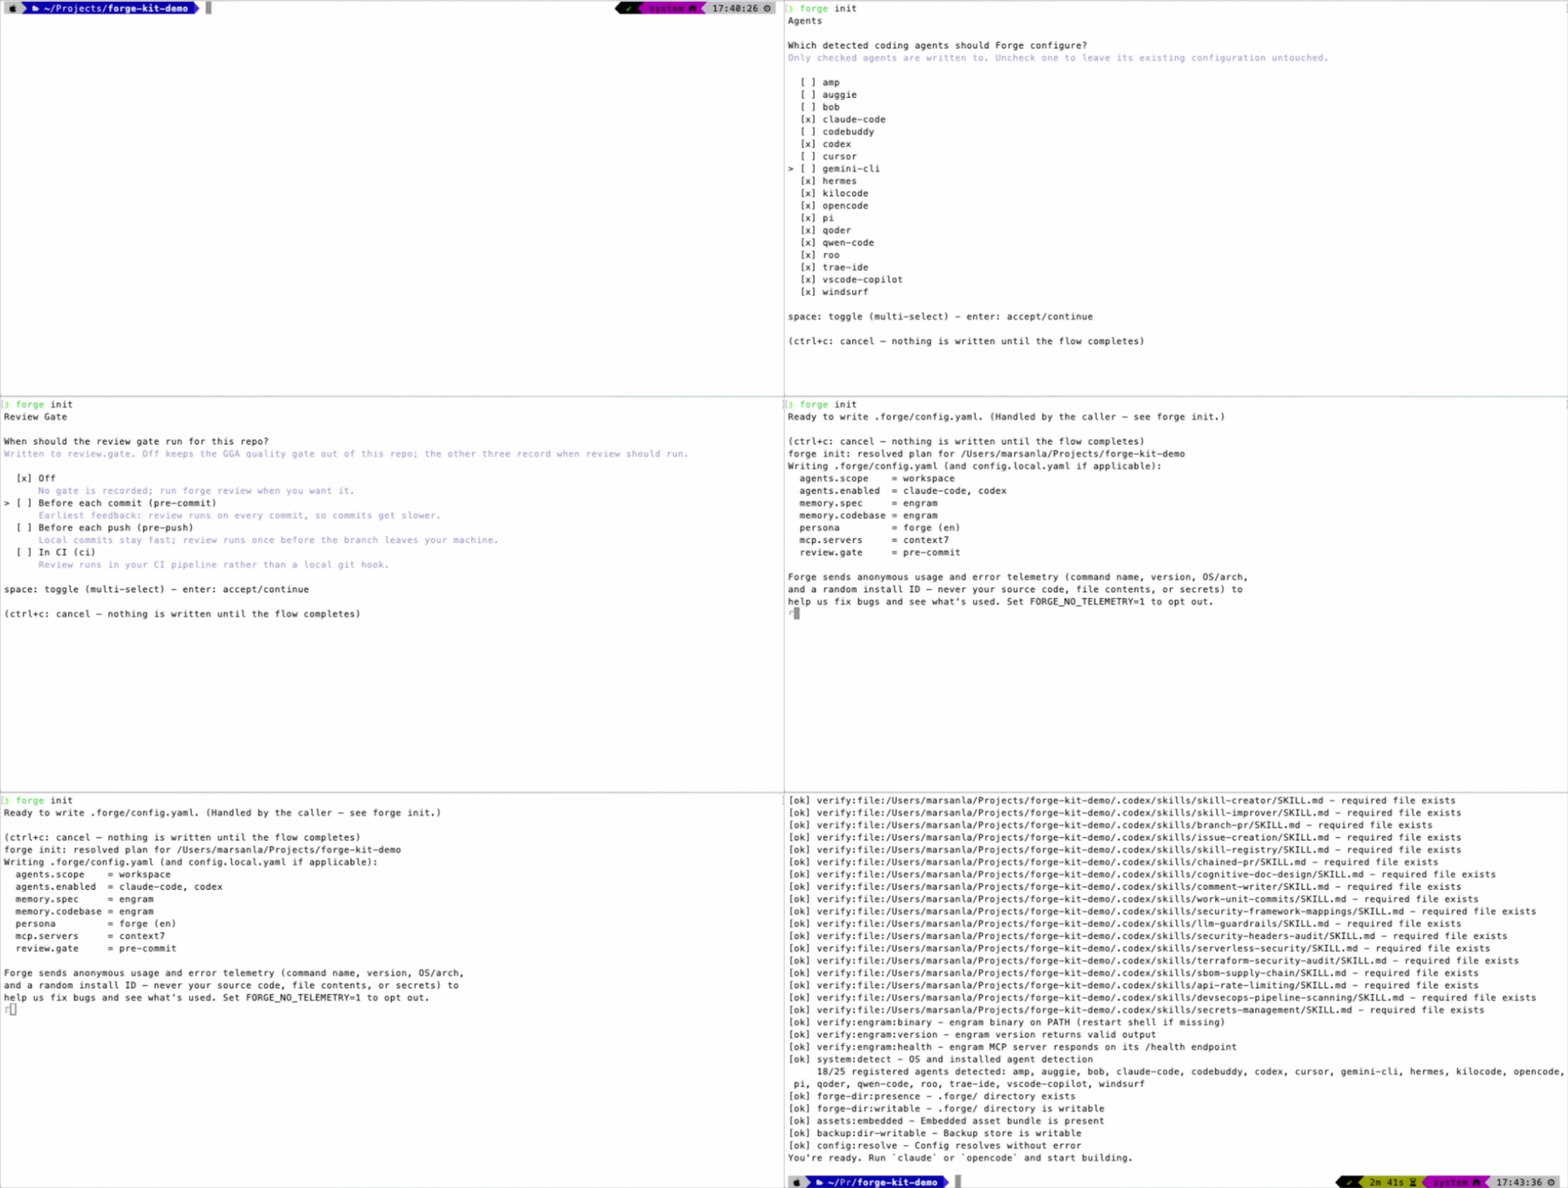
Installing the binary does not touch your agents yet. To detect and configure the agents you already have:
forge init        # scaffold .forge/ and pick agents (wizard, or --yes)
forge install     # write the Forge command set into your agents
forge install detects installed agents automatically. It backs up any existing agent configuration first, then writes the Forge command set. The operation is idempotent: running it again converges to the same state.
Common flags:
forge install --scope workspace          # configure for this project only
forge install --agents claude,cursor     # limit to specific agents
forge install --dry-run # preview changes, write nothing| Flag | Meaning |
|---|---|
--scope global|workspace | Where to write agent config. Default is global. |
--agents <list> | Restrict to a comma-separated set of agents. |
--dry-run | Show what would change without writing anything. |
See Agents for the supported agents.
Keeping Forge up to date
forge update       # check for available updates
forge upgrade      # apply updates to managed tools (binary-only)
Note that forge upgrade updates managed tools; it does not run the install/sync pipelines. Forge also checks for updates automatically on most commands; run forge update explicitly to control when a new release is fetched.
Pro tip: forge upgrade failing with "permission denied"?
If the binary lives in a root-owned directory (/usr/local/bin on a stock install), forge upgrade can't write the replacement binary there. Either run the upgrade elevated:
sudo forge upgradeor fix ownership once so you never need sudo for this again — see the pro tip under Install the binary above.
Snapshots and cleanup
Every mutation Forge makes is snapshotted automatically, so changes are reversible. There is no separate backup command — backups are taken before any mutating operation.
forge restore --list      # list snapshots
forge restore latest      # roll back to the most recent
forge uninstall --all     # remove Forge-managed config
Next steps
- Getting Started — walk one change end to end.
- Introduction — understand what Forge is and why.
- Configuration — customize
.forge/config.yaml.